Understanding the Exposure Triangle
- Alexander Lull Photography
- Oct 14, 2020
- 7 min read
Updated: Apr 2, 2021
I figured that I would not limit my blog posts to only showing off my photography and the products that I might be working with. There are many budding photographers out there that would rather learn some photography tips and tricks from fellow photographers that they trust the work of. Additionally, I'd like the opportunity to periodically give my two cents on various photography topics, such as the Raw Vs. JPG debate that has been going on since the advent of the digital DSLR camera. However, today we will focus on some of the basics of the exposure triangle. Have you ever been interested in taking your photography out of manual mode to get more control over your exposures, and by extension more out of your photography?
Why Shoot in Manual Mode?
This blog post will cover a quick introduction to the basics of how exposures work out of your camera, whether you are shooting in manual or any of the various automatic modes. To start off I'd like to try and give a quick answer to why you might want to take your camera out of auto mode. Simply put, most camera metering modes can easily get confused when taking pictures and expose for the wrong subject or miss the artistic ambiance of why you are taking the picture in the first place. For instance, you might be trying to freeze the motion of an athlete, blow out the background with natural lens bokeh for a portrait, or reduce noise in the exposed image. Sometimes you might also be going for a purposely over or under exposed image in order to set the "mood" of the photo, or in some cases simply exposing to what it actually looks like in front of you. Additionally, some cameras raw files work better in post-production exposing the image more to the left or right of the histogram. Finally, you might simply want to play with smoothing effects from long exposures and using ND filters.
Two photos demonstrating auto Vs. manual from a recent landscape shoot. Both pictures have been edited similarly, but the first one's exposure is from auto and the second photo is with manual exposure settings. The manually exposed photo is "under exposed" but has less image noise, more closely resembles what the actual landscape looked like at the time of shooting, and in my opinion is an overall better photo.
The list of reasons above that you might want to shoot fully manual is just a quick list and depending on the type of photography there might be additional reasons you might have for shooting manual. Most cameras also have semi-auto modes where you are responsible for setting one of the three primary exposure settings and the camera will set the other two based off its metering to get a proper exposure. These modes definitely have their place over shooting fully manual. They allow you to focus on fewer settings in fast paced situations, but often times once you are accustomed to full manual control it is pretty easy to make quick changes on the fly allowing that extra degree of your own personal style to your art.
Introduction of the Exposure Triangle
Every exposure from a camera is made up of three elements. These elements are lens aperture or how large the opening is inside the lens, shutter speed or how long the photo is exposed for, and ISO or how sensitive the sensor will be to the incoming light. When in one of the cameras various auto modes all or a subset of these three elements are handled for you. The issue with this is there is more to an exposure than simply getting the right amount of light in through the lens. Each of these three elements have benefits and drawbacks depending on the type of photo that you are shooting, where you are shooting it, and what the lighting conditions are like. Unfortunately, the camera's auto mode is unable to anticipate these additional criteria when it picks the settings for you.

I generate a clean graphic to show the exposure triangle. Many of the ones I see online are difficult to follow, have too much information, or the design is messy. Feel free to make copies of this graphic for your own reference on your photography adventures.
From overviewing the exposure triangle above, you might have noticed a couple of different things. One being a few different settings you might expect to see for each exposure element, and the other being what the secondary traits are of each element. For instance the lens aperture changes the depth of field you have with wider apertures (more light allowed through the lens) having narrower depths of field and narrower apertures (less light allowed through the lens) having larger depths of field. From shutter speed you might have noticed that it controls the blur of the image, especially images with motion in them. Faster shutter speeds are required to freeze motion to produce sharp images, while scenes with little to no motion can get away with longer exposures and still get a crisp image. Finally, you might have noticed that ISO controls the noise in the image. Under normal circumstances you'd try to keep this at its lowest native setting for your camera (usually 100) as noise in images is usually not desired. However, many modern cameras allow for usable images at larger ISO ranges such as 1600 and 3200 if the extra light is needed to get the desired outcome.
What is an Stop of Light?
A stop simply put is a way of equating the amount of light lost or gained from an adjustment of one of the three exposure elements. In the exposure triangle above, the few settings that are listed, are listed in full stops of light. Additionally, I've included a more comprehensive table below to assist. This table does not necessarily need to be memorized to shoot in manual, especially if you have a mirrorless camera as opposed to a DSLR. A mirrorless camera will allow you to see the results of your settings in real time, and on a DSLR you can usually take a couple test photos to get the exposure you want for your environment and be good to go from there.

You can use the table above as a starting point on how to make changes to your exposure using stops of light. For example, if your exposure is spot on with the settings of f4.0, 1/250s, and ISO of 1600 and you'd like to reduce your ISO to 400 in order to reduce image noise, what do you need to do to the other two settings in order to maintain the exposure levels? A reduction of ISO from 1600 to 400 is a reduction of 2 stops worth of light. 1600 to 800, 800 to 400. To maintain exposure levels, you will need to increase your exposure two stops between lens aperture and shutter speed. Possibly going up two stops of light on shutter speed from 1/250s to 1/125s to 1/60s to maintain the exposure level, but with less noise due to a lower ISO setting. You follow the same process for changing stops of light to obtain other effects as well, such as stopping motion with faster shutter speeds or increasing depth of field with lens aperture for landscapes.
If you are finding it difficult to obtain starting points for setting proper exposure, then a good learning tool is to actually use auto mode. Find something you want to take a picture of and take a quick picture with auto mode switched on. Then check and see what settings the camera used to get a "proper" exposure. Now all you need to do is use the table above to make stop of light changes to the desired exposure element to obtain the best photo for what you are shooting. After doing this a few times it starts to become second nature, and before you know it you'll be taking pictures in manual mode as effectively as in auto mode, except the photos will be how you see them, not how the camera sees them.
Below I have included a few examples of the variability in images you can get by changing one of the three exposure elements. I hope this helps to give a good idea of what you can accomplish using the exposure triangle and manual mode.
Lens Aperture Examples
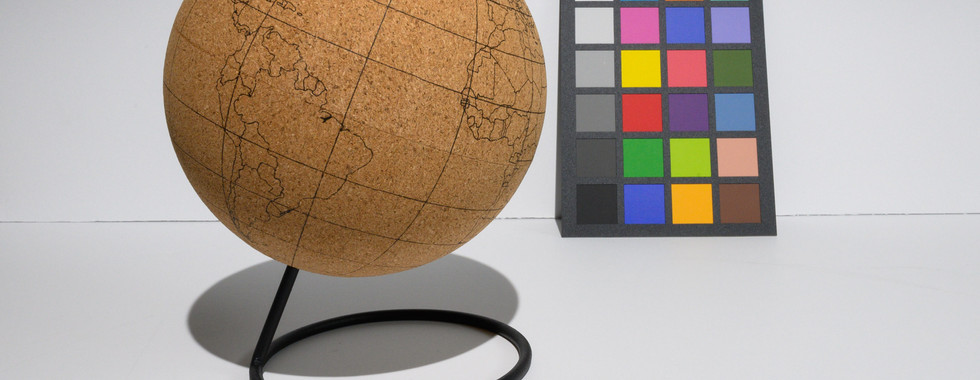
Here we have identical exposures for light, but drastic variations in aperture to demonstrate depth of field control. The first image shows the whole image, both globe and color chart fairly well in focus at an aperture of f22. The second image shows the color chart blurred, as the globe is the focus point with aperture of f2.8. ISO and shutter speed were adjusted to keep the exposures identical otherwise.
ISO Examples
A series of images with varying ISO from 100 to the Nikon Z6's native max of 51200. I included a zoomed in image to help with seeing the noise as you increase ISO. The Nikon mirrorless cameras are fairly good at dealing with increased ISO, as you will see here.
Shutter Speed Examples
Here are four photos that demonstrate some exposure speed effects. The waterfall is showing the effects of a slightly longer exposure on moving water, it causes a smoothing effect. The night shot is another demonstration of smoothing of water in a river from a 20 second exposure. We then have two identically exposed photos of a candle. The first is with a shutter speed of 1 second and as you can see there is blurring in the flame. The second one is with a shutter speed of 1/125s and it starts to bring out the details of the flame.
If you found this quick guide to the exposure triangle useful and would like to see more tips and tricks for photography, then let me know down in the comments. Have an awesome day, and until next time!


